Emulator安装与应用调试
便携版(推荐)
以下内容仅适用于Windows
对于Windows用户,我们推荐使用便携版Chrome_Emulator:
- 无需手动安装Emulator插件
- 无需手动为Chrome添加启动参数
使用方式
- 下载PortableEmulator.zip并解压到本地(注意:解压路径请不要含有中文字符)
- 进入解压后Chrome_Emulator所在目录,启动Chrome_Emulator.exe,请参见下图:

-
在Chrome地址栏中输入应用地址,形如:
-
http://xxx/app/index.html
-
file:///D:/xxx/app/index.html
-
-
点击Emulator插件图标
 ,选择“Enable”等待页面重新加载
 -
运行Chrome“开发者工具”开始应用调试
手动版
以下内容适用于Windows以及OS X
手动版要求用户手动安装Emulator并设置Chrome启动参数,具体操作如下:
Emulator安装
-
下载并安装最新的Google Chrome浏览器(参考版本:23.0.1271.64)
-
运行Chrome,在地址栏中输入chrome://chrome/extensions/并打开页面(或通过“工具”->“扩展程序”打开)
-
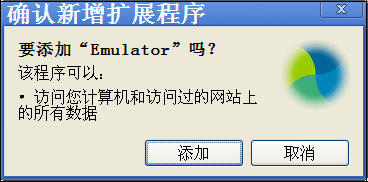
下载ManualEmulator.zip并解压到本地,拖动Emulaltor.crx文件到“扩展程序”页面并按照提示安装
-
安装后需勾选“允许访问文件网址”以允许加载file:协议的url(调试本地应用时将使用file:协议)

应用调试
本地应用调试
-
确保开启“允许访问文件网址”权限(打开chrome://chrome/extensions/开启)
-
设置Chrome启动参数:
- Windows:
- 右键单击“Chrome”图标
- 选择“属性”并编辑“目标”,在行尾添加参数: –allow-file-access-from-files –disable-web-security
- 编辑后“目标”行形如:chrome.exe –allow-file-access-from-files –disable-web-security
- OS X:
- 运行Terminal.app
- 输入: /Applications/Google\ Chrome.app/Contents/MacOS/Google\Chrome –allow-file-access-from-files –disable-web-security
- Windows:
-
重启Chrome并在Chrome中打开本地应用
-
点击Emulator插件图标
,选择“Enable”等待页面重新加载 -
运行Chrome“开发者工具”开始应用调试
远端应用调试
-
运行 Chrome并在地址栏中输入应用地址,如“http://xxx/app/index.html”
-
点击Emulator插件图标
,选择“Enable”等待页面重新加载 -
运行Chrome“开发者工具”开始应用调试
其他说明
如果安装或使用过程中遇到问题,请参考FAQ或联系opensource@polyvi.com,我们会尽快回复您!